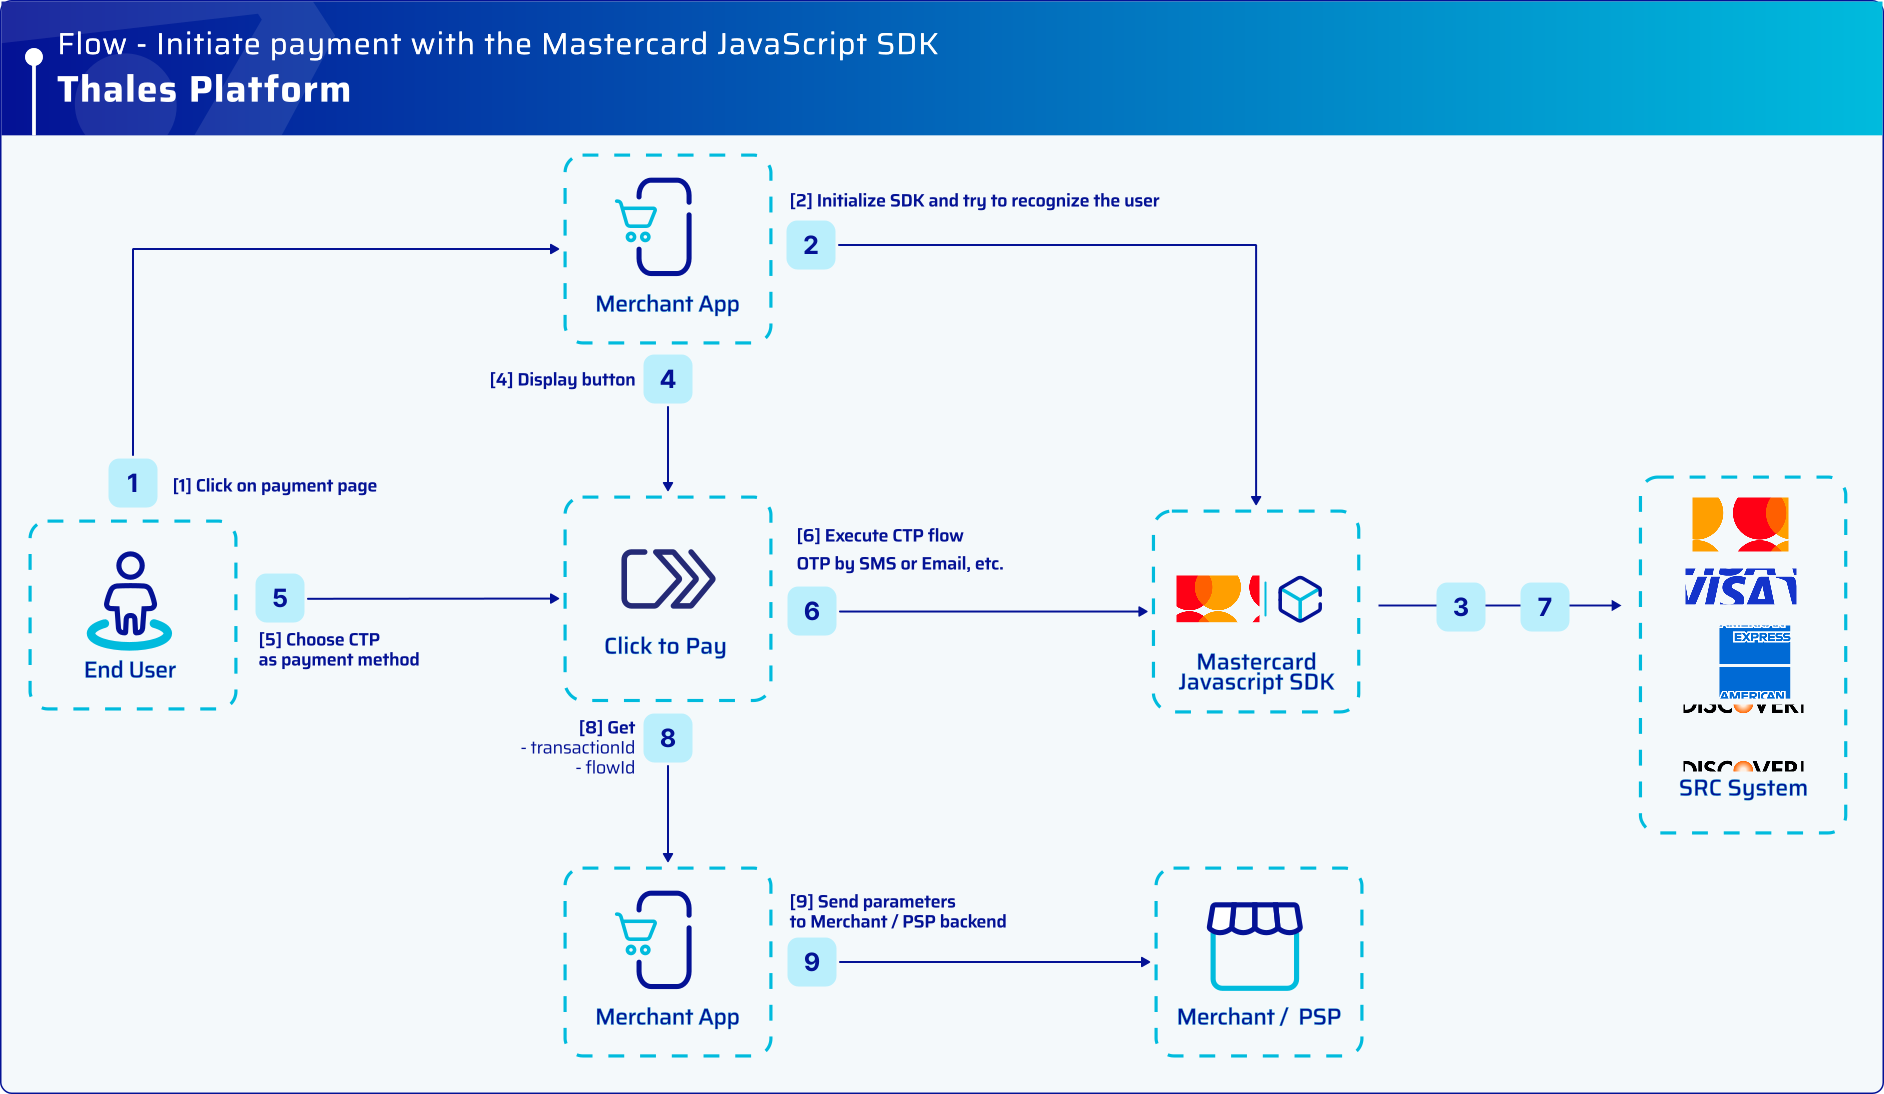
Click to Pay payment initiation flow.
Click to Pay payment initiation flow.
| Step | Description |
|---|---|
| 1 | The end user is ready to pay. |
| 2 | The merchant application or website calls the Mastercard JavaScript SDK to detect whether the end user is recognized. |
| 3 | The Mastercard JavaScript SDK checks the end user status with the payment network. |
| 4 | The merchant application or website renders the user experience for the detected flow. The merchant application or website stays in control of the page. It can use UI components provided by the Mastercard JavaScript SDK. |
| 5 | The end user selects Click to Pay as the payment method. |
| 6–7 | The Mastercard JavaScript SDK runs the Click to Pay payment flow. |
| 8–9 | The merchant application or website receives transactionId and flowId and sends them to the merchant/PSP backend. |
.svg)
Payment data retrieval flow.
| Step | Description |
|---|---|
| 10 | The merchant/PSP sends a backend-to-backend request to Thales to retrieve payment data. |
| 11–12 | Thales backend contacts Mastercard, which coordinates with other payment networks as needed. |
| 13–15 | Thales backend returns the payment data for authorization (for example, a token or PAN). |
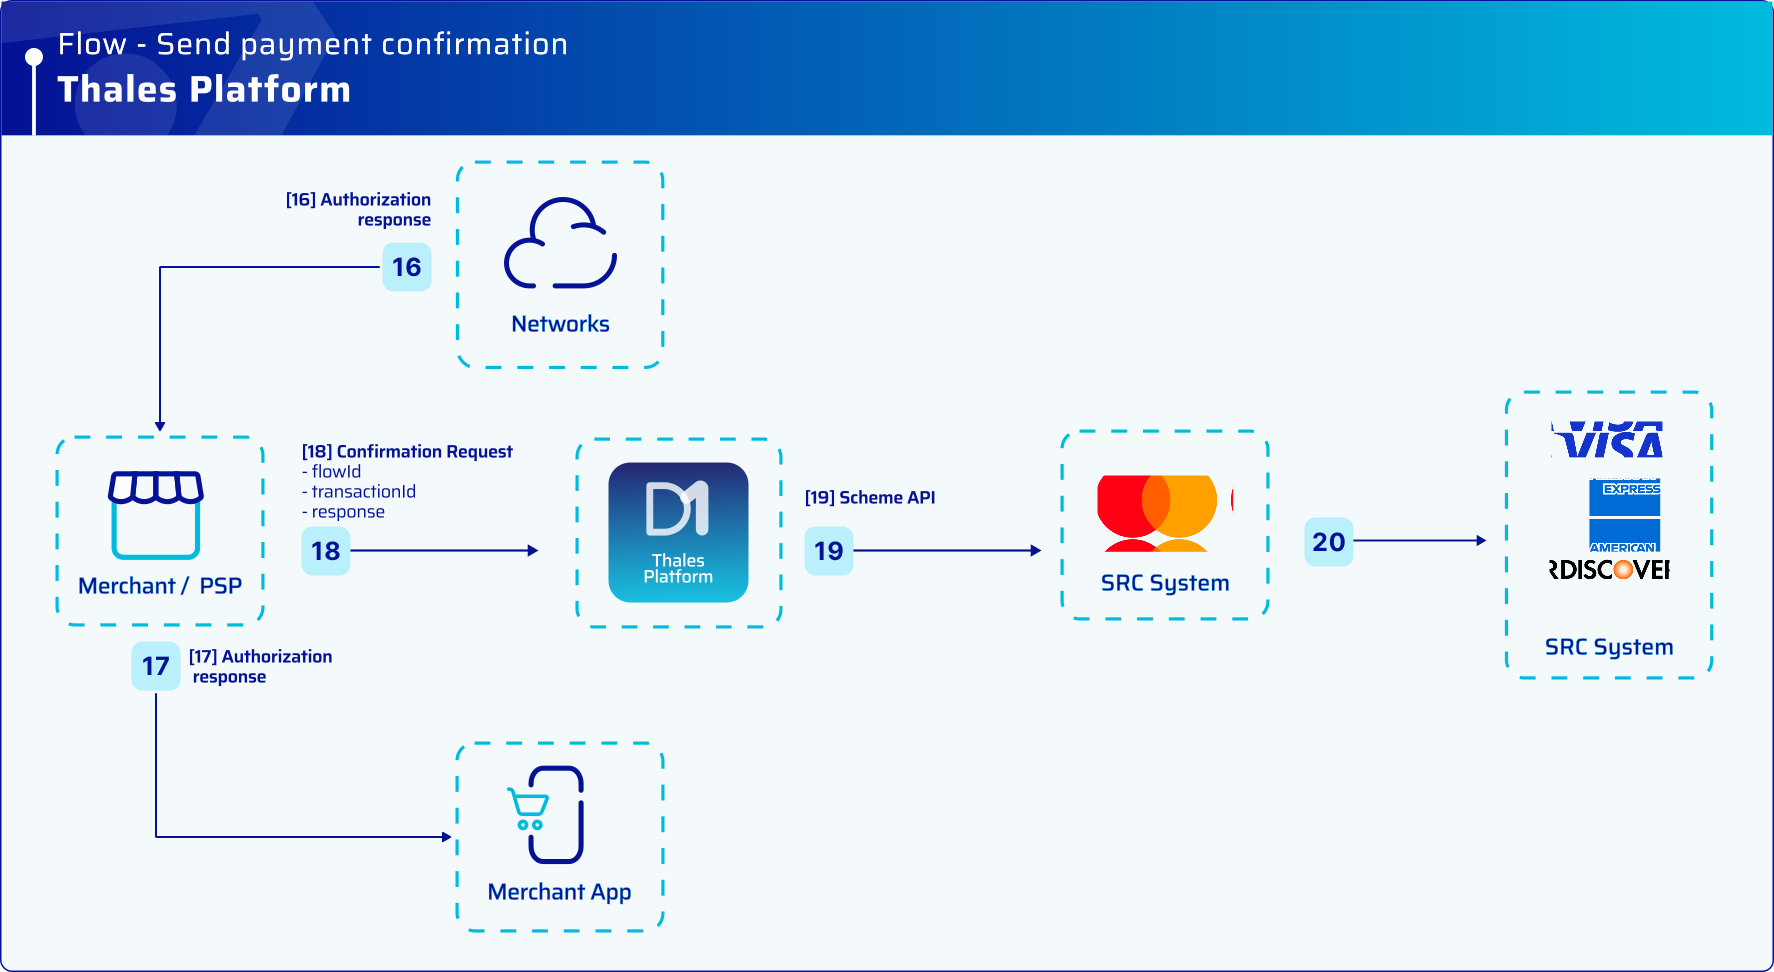
Payment confirmation flow.
| Step | Description |
|---|---|
| 16–17 | The merchant/PSP receives the authorization response and displays the result to the end user. |
| 18–20 | The merchant/PSP sends the transaction result to Thales backend, which shares it with the payment network. |